Showing posts with label Guides. Show all posts

Wednesday, July 31, 2024

How to View Sent Photos on Instagram in 2024

July 31, 2024 0

 Since Instagram is mainly a photo-sharing platform, you may have exchanged many photos & videos with your friends in a chat.

There are no restrictions on exchanging photos and videos on the platform, but at times, you may find it difficult to access the photos you have sent, and you may want to recheck them.

So, is it possible to view the photos sent on Instagram chat? Yes! A workaround lets you view all media files shared in a DM. Here’s what you need to do.

View Sent Photos on Instagram

Note: We have used an Android device to demonstrate the steps. The steps are the same for Instagram for iPhone.

1. First, open the Instagram app on your Android/iPhone and log in to your account.

2. Once logged in, tap on the Messenger icon at the top-right corner of the screen.

Messenger

3. This will open the conversation page on your Instagram. Here, you need to select the chat in which you wish to see the messages containing the photos.

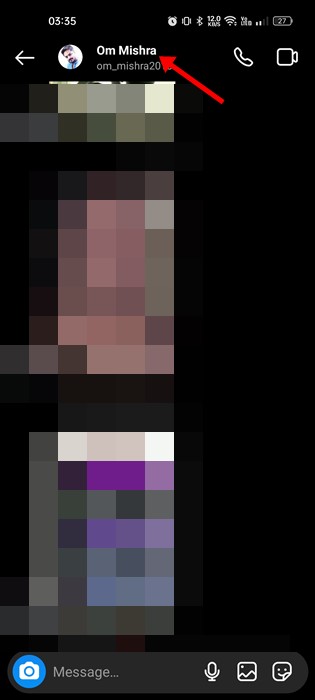
4. When the chat panel opens, tap on the username next to their profile picture.

tap on the username

5. This will open the Chat Details page. Scroll down to the Posts & Reels or ‘Photos & Videos‘ section. Next, tap on the ‘See all‘ button.

Photos & Videos

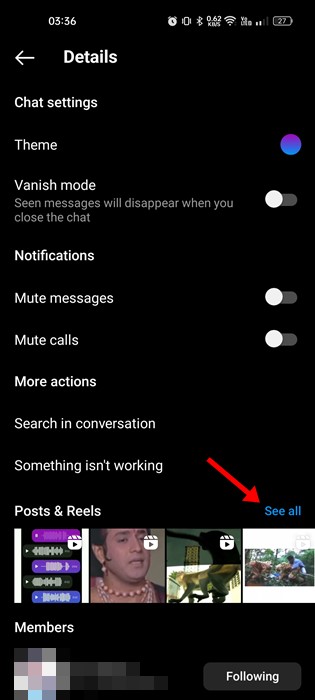
6. Now you will see all the photos & videos you have sent in the chat.

After knowing the correct way to check sent photos and videos, you won’t have to scroll through the chats to check the media files individually.

How to See Disappearing Photos sent on Instagram

In 2021, Instagram launched a new feature that allowed users to send disappearing photos and videos. With this feature, you can share messages and photos and set them to disappear after a set time.

Now, if you’re wondering if you can see disappearing photos sent on Instagram, NO, you can’t. There’s no option to access the disappearing photos you have sent someone on chat.

However, Instagram does allow you to see the status of a disappearing photo or video you’ve sent on the chat. To do so, follow the steps shared below.

See Disappearing Photos sent on Instagram

1. First, open the Instagram app on your Android or iOS.

2. Next, tap on the Messenger icon in the top-right corner.

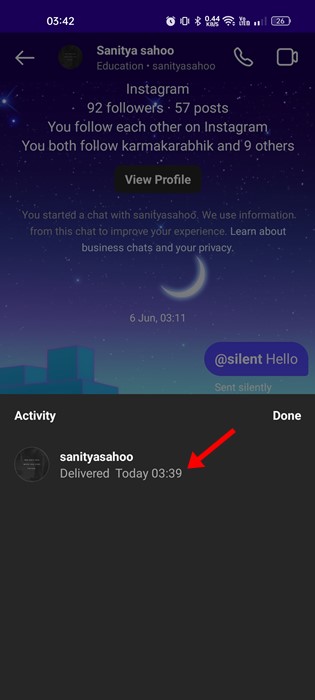
3. Select the conversation where you’ve sent the disappearing photo.

4. Just below the disappearing photo, you will see the status. If someone has taken a screenshot of your message, you will see a dotted circle next to it.

FAQs

We understand you may have questions about Instagram photos sent in a DM. Below, we have answered a few of the most asked questions.


Can I see disappearing photos I sent on Instagram?

You can replay the photos when they’re available. Once they disappear, you cannot see them again. Also, you can replay a photo or video you received only if the sender has allowed it to replay.


Can I recover unsend photos on Instagram?

No, there’s no way to recover unsend photos on Instagram. However, quite a few tools available on the web claim to do so. Avoiding such tools is recommended because they are not genuine and can invite security & privacy risks.


How long can you see Instagram Photos sent on DM?

A photo sent on a DM stays there forever. It will remain in the DM unless the user account is deleted, the photo is reported and taken down, or the user deletes the photo manually.


How to see someone’s deleted Instagram photos?

If the user deletes the photo, there’s no way to view it again. If you post a photo and it’s deleted, you can view it from the Recently Deleted folder.


This guide explains how to see photos sent on the Instagram app. If you need more help viewing all your sent photos on Instagram, let us know in the comments. Also, if the article helped you, share it with your friends.

How to Save YouTube Videos to Camera Roll (4 Methods)

July 31, 2024 0

 While YouTube doesn’t restrict you from watching videos, you may want to download videos for offline playback if you are low on the internet. Yes, the Android and iOS YouTube app offers you an option to download videos, but this still requires you to watch the videos using the YouTube app.

What if you can download YouTube videos to the camera roll on Android and iOS? You can save YouTube videos to the gallery with an Android device. On iPhone, you can save YouTube videos to the camera roll.

Technically, you can’t save YouTube videos to the Camera roll directly using the YouTube app, but you can use third-party applications’ help to achieve the same. Below, we have shared some easy steps to save YouTube videos to a camera roll. Let’s check out.

1. Save YouTube Videos to Your Camera Roll/Gallery on Android

On Android, saving YouTube videos to your Gallery is easier. The shared method downloads the videos and allows you to access them from the Gallery app. Here’s what you need to do.

1. Open the Google Chrome web browser on your Android device.

2. Next, open any YouTube downloader websites. Here we have used SSYoutube.

3. Open the YouTube video you want to download and copy its link.

copy its link

4. Once done, paste the video link on the SSYoutube website and tap the Download icon.

SSYoutube

5. The SSYouTube site will provide you with all the download options. You need to pick the quality of the video, and the downloading will start.

pick the quality of the video

6. Once downloaded, you can move the video to the Downloads folder. Even if you don’t move the video, it will still appear on your Gallery app.

move the video to the Downloads folder

2. Save YouTube Videos to Your Camera Roll Using Wave.Video

Wave.Video is basically a website that lets you download & save the videos to your gallery app. The site is extremely easy to use, and you are not required to create an account. Here’s how to use the site to save YouTube videos to camera roll.

1. Open the YouTube video you want to save and tap the Share icon.

Share

2. On the Share menu, tap on the Copy Link.

Copy Link

3. Open your favorite web browser on Android.

4. Now, visit the Wave.Video website and wait until the site loads.

5. Paste the video link you’ve copied and wait until the site fetches the video.

paste the video link

6. Once fetched, tap on the Convert to Video option and tap on Download Video.

Convert to Video

7. The video will start to download on your web browser. You will find the video on your Camera roll or gallery app.

start to download

3. How to Save YouTube Videos to Camera Roll on iOS

On iOS, you must install a third-party app to save the YouTube videos to the Camera roll. For this purpose, we will use the Documents by Readdle app. Here’s what you need to do.

1. First, copy the YouTube video URL you want to download.

copy the YouTube video URL

2. On the Safari web browser, open the Y2Mate website. Now paste the YouTube link you have copied on the search bar and hit the Download button.

paste the YouTube link

3. Next, select the video quality you want to download.

select the video quality

4. Once downloaded, you will find the downloaded video in your iPhone’s Downloads folder.

Downloads

5. Once downloaded, tap on the video and the Share button at the bottom left corner.

Share

6. On the next screen, select the Save Video option.

Save Video

7. The video will be saved to your Camera roll.

4. Use Online Video Downloaders

Best Online Video Downloaders

If the SSYouTube or Y2Mate is not working, you can also use other free online video downloaders.

There are hundreds of online video downloaders available on the web. Almost all of them allow you to download videos from leading sites such as YouTube and Vimeo.

So, you can check our guide Free Online Video Downloaders, and pick the site that best suits your need. After picking the site, you can use it to save YouTube videos on the camera roll.

Other Ways to Download YouTube Videos on Your Phone

If you want to stay safe, it’s best to use the App’s download feature. The app has an option to download YouTube videos for offline playback.

The only requirement is that you watch the videos using the YouTube app. Furthermore, you can purchase YouTube Premium to get some better features.

YouTube Premium allows you to download videos of high quality, and there are no restrictions on the number of videos you can download. Also, YouTube Premium will remove ads from the videos.

Frequently Asked Questions

Can I download YouTube videos to my camera roll?

Absolutely, yes, you can download your favorite YouTube videos directly from the camera roll. However, you need to follow the methods shared in the guide.

Can you save videos from YouTube?

YouTube provides a download feature to save videos for offline playback. However, the saved videos won’t be available on the camera roll or Gallery app.

Does YouTube Premium let you save videos to a camera roll?

No, YouTube Premium removes ads and unlocks the superior quality of video downloads. However, the downloaded videos won’t appear on your phone’s gallery.

Is it legal to download videos from YouTube?

You can use the download feature of YouTube to save videos for offline playback. However, using third-party tools to download videos isn’t legal.

These are the best methods to save YouTube videos to Your Camera roll. While we have targeted YouTube, the steps work for other video sites, such as Facebook, Vimeo, Dailymotion, Instagram, etc. If you need more help saving YouTube videos to your camera roll, let us know in the comments below.

How to Fix Chrome Automatically Deletes Downloaded Files

July 31, 2024 0

 Google Chrome is definitely the most popular and most used desktop web browser worldwide. It offers a few exciting features that are supposed to provide a better user experience.

However, recently, a few users have been facing problems while downloading files using the Google Chrome browser. According to the user reports, the newly downloaded files do not show up in the Downloads folder and are deleted.

Why are my downloaded files deleted?

If your downloaded files are automatically deleted, there could be various issues. It’s possible that the browser’s enhanced protection feature is preventing the file from downloading because of a virus or malware.

The firewall/antivirus program and third-party software interference could also be a reason. Whatever the reason is, if your downloaded files are getting deleted, here’s what you can do.

How to Fix Chrome Automatically Deletes Downloaded Files?

You can prevent Google Chrome from automatically deleting your downloaded files by changing the browser settings. Here’s what you need to do.

1. Make Changes to the Safe Browsing

The Safe Browsing modes of Google Chrome prevent malicious files from downloading. Even when the download completes, it’s automatically deleted to prevent your system. So, you need to make a few changes to the Safe Browsing mode of Google Chrome to allow all downloads.

1. Launch the Google Chrome browser on your PC.

2. When the browser opens, click on the three dots at the top right corner.

three dots

3. On the menu that appears, select Settings.

Settings

4. On the Settings screen, switch to the Privacy and Security tab.

Privacy and Security

5. On the right side, click on Security.

Security

6. On the Safe browsing, select No Protection.

No Protection

2. Turn Off the Threat Protection on Windows Security

Windows Security is another reason your files get deleted after downloading. While it’s not recommended to turn off Windows Security’s real-time protection, if you still want your downloads, you can disable it temporarily.

1. Launch the Windows Security app from the Windows 11 Start menu.

Windows Security

2. When the Windows Security app opens, switch to the Virus & threat protection.

Virus & threat protection

3. Next, click the Manage Settings link under the Virus & threat protection settings.

Manage Settings

4. On the next screen, turn off the toggle for Real-time protection.

Real-time protection

3. Turn Off the Third-party Antivirus, Firewall, or VPN Apps

Third-party Antivirus, Firewall, or VPN apps can sometimes interfere with ongoing downloads and prevent them from being saved.

If you suspect a firewall restriction, you need to add Google Chrome to the Firewall exception list. You also need to do the same for Windows Defender.

And if you’re using any VPN or Proxy, keep them disabled until the download completes.

4. Reset the Google Chrome Settings

If nothing works for you to fix Chrome automatically deleting downloaded files, your best bet is to reset all Chrome settings to their default values. Here’s what you need to do.

1. Launch the Google Chrome browser. Next, click on the three dots at the top right and select Settings.

Settings

2. On the Chrome settings, switch to the Reset Settings tab.

Reset Settings

3. On the right side, click on Restore settings to their original defaults.

Restore settings to their original defaults

4. On the confirmation prompt, click Reset Settings.

Reset settingsOur shared methods will help you prevent Chrome from deleting your downloads. If the downloads are not deleted by Chrome, they will be available on the Recycle Bin, Quarantine folder of Windows Security, etc. Let us know if you need more help on this topic in the comments. Also, if you find this guide helpful, don’t forget to share it with your friends.